Optical profilometry is a rapid, non-destructive, and non-contact surface metrology technique. There are several methods for collecting data: Focus Variation, White Light Interferometry, and Laser Scanning Confocal. Depending on the method used, vertical resolution can be on the order of nm to several hundreds of um, while lateral resolution depends upon the system and objective and is typically in the range of 0.26um – 4.4um.
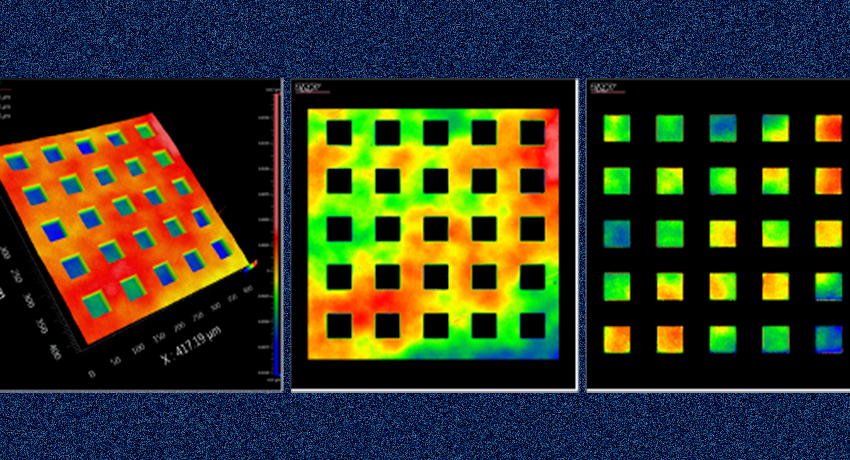
Surface topography of E-beam patterned dose array on photoresist (feature depths of 4nm up to 50nm).
Tracking surface topography changes on the interior surface of ostrich eggshells during embryonic development (stitched 1mm FoV).
- True imaging (area measurement, not serially point by point).
- Fast data acquisition over large areas.
- Non-contact and nondestructive.
- Large Z-axis range, from several nanometers up to feature heights as great as 7mm.
- Variable field of view, 90µm up to 6mm (stitching is available).
- Critical dimension measurements (X, Y, and Z).
- Surface topography.
- Step height.
- Characterizing wear of mechanical parts.
- Coating thickness of transparent films with known refractive index (at least 1µm thick).
Zygo Nexview 3D Optical Surface Profiler
- White Light Interferometry.
- 2.5x, 10x, 20x, 50x objectives with 0.5x, 1x, 2x internal magnification.
- Automated image stitching.
- 200mm XY stage and 100mm Z clearance with capacity for up to 10lbs.
A white light interferometer is a type of profilometer in which light from a lamp is split into two paths by a beam splitter. One path directs the light onto the surface under test, the other path directs the light to a reference mirror. Reflections from the two surfaces are recombined and projected onto an array detector. When the path difference between the recombined beams is on the order of a few wavelengths of light or less, interference can occur. This interference contains information about the surface contours of the test surface. Vertical resolution can be on the order of several angstroms while lateral resolution depends upon the system and objective and is typically in the range of 0.26um – 4.4um.
- Focus variation, laser scanning Confocal.
- 2.5x, 5x, 10x, 20x, 50x, 50x ELWD with digital magnification and coaxial/ring lighting.
- Automatic image stitching.
- 150mm XY stage, 72mm Z clearance, 7mm max scan length, capacity for up to 6.6 lbs.
Laser scanning microscopes incorporate two light sources: a white light for gathering color information, and a laser source for gathering height information. To capture height data, the laser is scanned in the XYZ directions across the surface of the sample, and the reflected light intensity is measured. The result is a high-resolution, large depth-of-field, color image with nanometer-level height resolution for accurate profile and roughness measurements.


